I have loved the idea of Flags at an exit for awhile. They are so cute and playful, and pretty in photos. On top of that, we wanted our "big exit" to be from the church instead of the reception, and being daytime, we nixed the idea of sparklers. Further more, our church does not allow rice or birdseed or bio-confetti to be tossed because it would end up all over the city sidewalk ( and I guess the city doesn't like that?). Flags seemed like the perfect solution. But what would the flags say?
 |
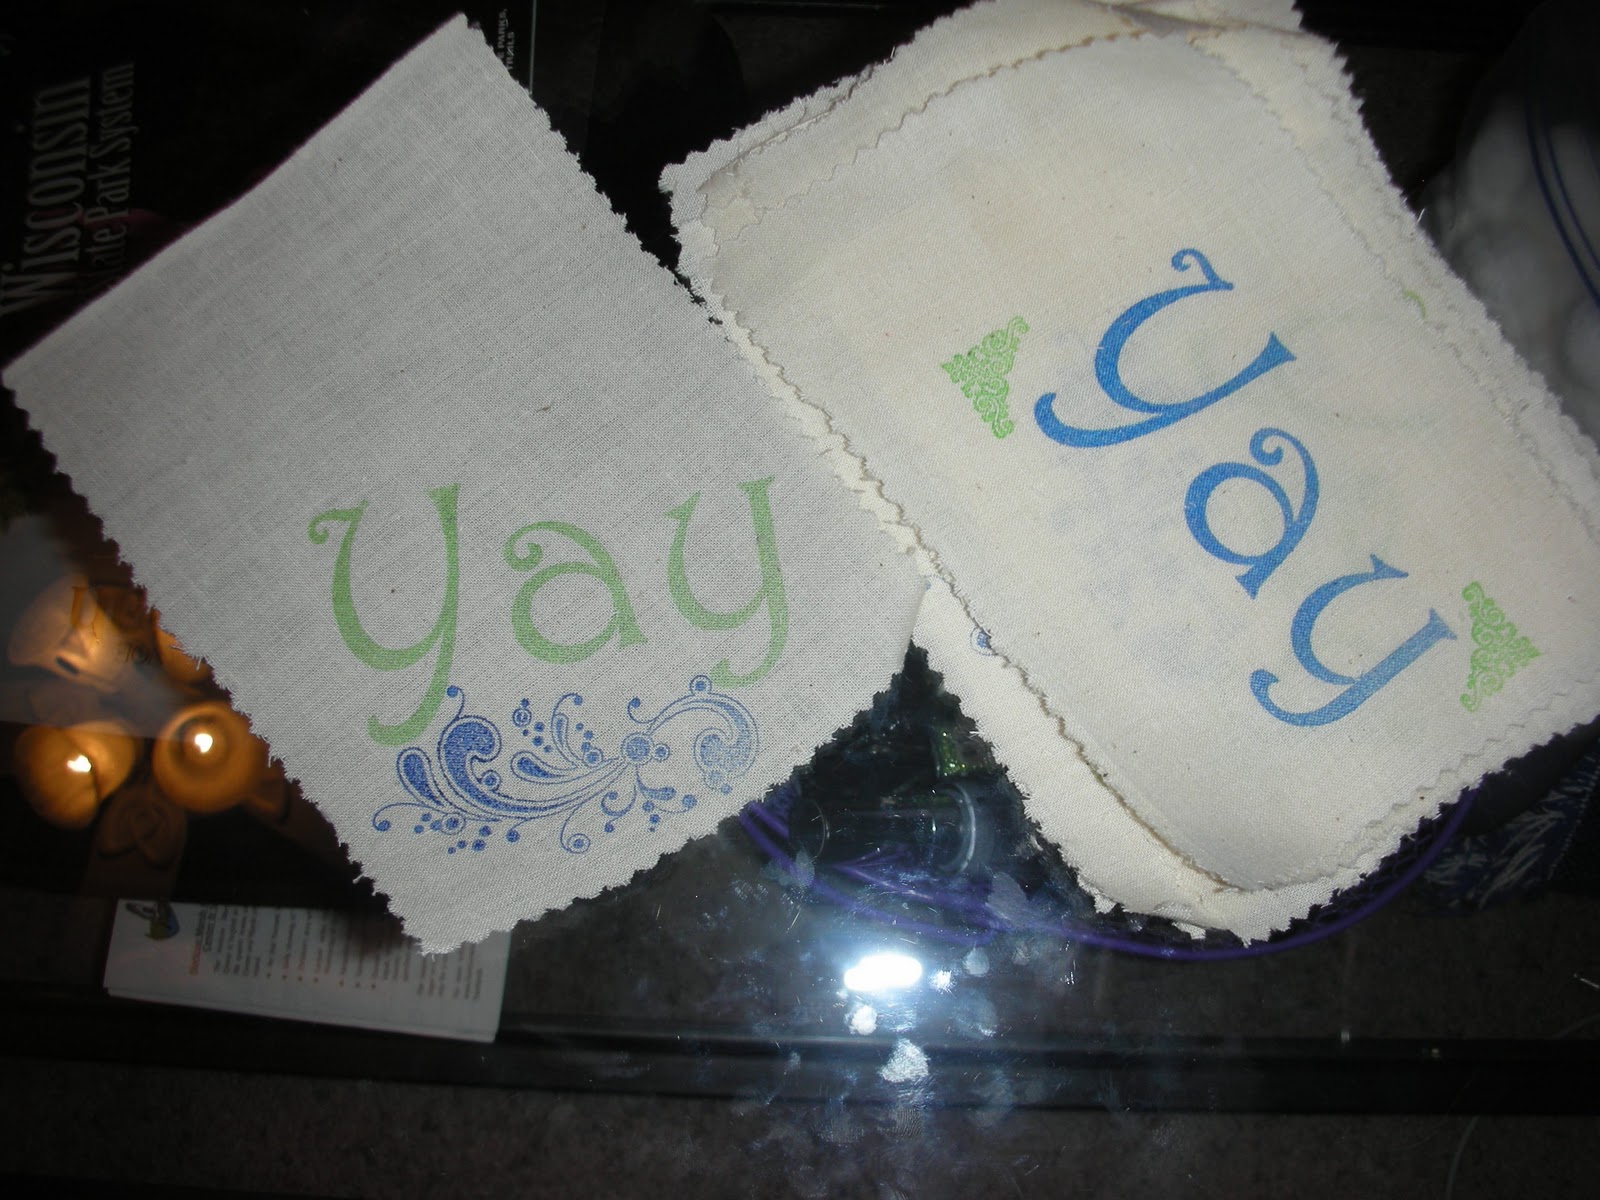
| Image by Kate Hayes at L Photographie |
Well, MOH MD answered that when she commented, early in our engagement, that I included the word "yay" in every one of my, twice(ish) daily at the time, e-mails. [I should note, blogging has really helped cut down on the wedding spam to my bridal party.They thank you.] She said that "Yay" should be the theme of the wedding. While I did not go that far, I thought it was the perfect option for the flag and more fitting than say, "congratulations" or "Hooray" or even, "Yippy".
So with a very basic idea of what we wanted, Mr. Aardvark and I set out on our first post-invitation craft.

As per usual Mr. Aardvark was very helpful. It was his wonderful idea to use the heat gun to peal the sticker off our dowels. I was very grateful for this hot tip (pun intended) because it had taken me about 15 minutes to get one off.

Once all the dowels we de-stickered we cut them into thirds so they would be a reasonable size for flag waving. Then I asked really nicely if Mr. Aardvark would sand them, as I didn't want any of our guests to get splinters. Being the trooper that he was, he braved the Wisconsin cold to make sure all of our guests would be safe.

At this point the dowels got put on hold because it was entirely too cold to paint them outside and there was NO WAY spray painting inside was a good idea.
I moved on to the actual flag part. I had purchased 2 yards of muslin and it was too much by about 1/2 a yard. However, better safe than sorry. I'm sure I can find some way to use the rest of it.
I pressed all the wrinkles out and then folded it into strips as wide as I wanted my flags and ironing it again at
each layer. This made it easy to cut along the crease instead of worrying about marking or pinning. It also helped me to cut a straight(ish) line.
each layer. This made it easy to cut along the crease instead of worrying about marking or pinning. It also helped me to cut a straight(ish) line.

I used my pinking shears to cut so I would not have to worry about fraying. If you don't know what pinking shears are, they are not just pink scissors (although, as you can see, mine are pink) they are fabric scissors that cut a zig zag and help keep woven fabric from unraveling.

Once I had all my strips cut I then cut them into flag size blocks.

I know it seems like a lot of ironing, but if you hate to iron, I would skip all of the steps except this one! Spray those suckers with starch and iron again!

If you don't starch, you flags will be floppy and flaccid.(Boo) And no one will be able to read or enjoy them!

For the next step you need a stamp (unless you have amazing handwriting and tons of time [I am running short on both]). I got mine from Stamp Out Online an etsy shop that makes fantastic custom stamps. They did our return address stamp as well, and have really helped feed my obsession with the font Harrington. Since our "Yay" stamp was so big, they mounted it on an acrylic block which made stamping even easier! (It was also really cool to watch the ink soak into the fabric).

I decided one color was not enough so after stamping some blue ones, I switched to green.

I toyed with outlining the green with pen, to make it pop but did not love the results. Instead, used a couple other stamps I had around to "highlight" the text.
Now, back to the dowels. I had given up on painting outside-outside so I set up a "paint booth" AKA cardboard box in the garage. I painted a batch and brought them in to dry.


After the dowels were painted and while they were drying, I had a moment of inspiration. I had extra "Fancy" paper left from the invites and a really cool pair of "Shredder scissors I purchased and had been jonesing to use.
I cut the paper into two(ish) inch strips and then got frindgy.

Finished product, feeling fancy.

I then cut the long fringy strips into shorter chunks. and rolled them a little bit so there was a little curl to them.

With the dowels dry it was time to bring these two together.

I wrapped and hot glued the paper to the tops our the pretty silver sticks.


A couple of episodes of Law and Order later, and I was done!


I made about sixty of these guys but they will not be the only thing making an appearance at our exit. FMIL Aardvark has been an amazing help and made an alternative waver for people who prefer ribbons to flags. I will share those soon! Yay!

What are you doing for your big exit? If you are already married, did you use flags? Did you like them?
No comments:
Post a Comment